

We all know that sweet green padlock in our browsers, meaning that our connection to a website is secure. Don’t underestimate encrypted connection! Without it, all data is sent in plain text. It’s very dangerous if your site handles secret data, like passwords or emails.
Recently, my colleague from work logged into our office router. It’s usually very simple if you are connected to a Wi-Fi network. After that, he could tell exactly what sites we were visiting and what data each of us was sending. And now imagine that our visitors are using unsecured networks, like airport / hotel / restaurant hotspots. Network admins or hackers can easily capture exchanged data. Damn, even internet providers can read it!
If you want to prevent that and guard your users, use SSL!
Prerequisites
- Installed nginx (you can find instructions here)
- Working webserver (In article I’m assuming
localhost:8080address) - Site proxied through nginx
So, let’s start!
Generating Certificates
Before setting up certificate, you need to somehow get one. One of the easiest (and free!) way is using Let’s Encrypt Certificate Authority.
Remember! Certificate can’t be issued for an IP address. It can be generated and self-signed, but browsers won’t accept it.
Let’s Encrypt certificates are valid for 3 months, and need to be regenerated afterwards. Thankfully, there is an automated way to do this, called Certbot. It’s a bit different depending on your operating system and I won’t show how to use it. Instead, I’ll present a way to generate certificates using website sslforfree.
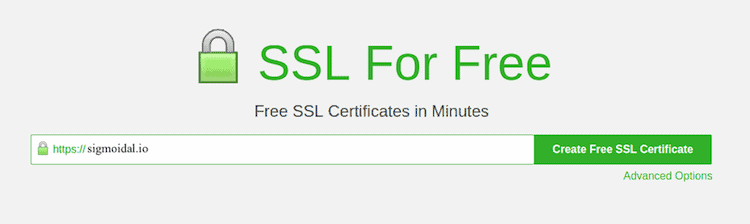
Visit the website and type all domains and subdomains you want the generated certificate to protect. Remember that www is also a subdomain.
Now we need to prove that we own selected domains. We can do it in multiple ways, but probably the most straightforward one is to upload provided files to our website.
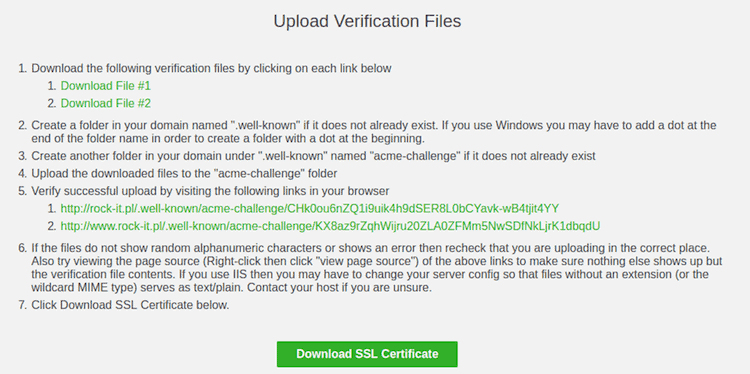
Download files and store them in nginx static files root, so they are publicly available. For example if your site static root is /usr/share/nginx/html/, you can create files using:
sudo su - # we want to have root privileges
DIR=/usr/share/nginx/html/.well-known/acme-challenge
mkdir -p $DIR
echo "file1_content" > $DIR/file1_name
echo "file2_content" > $DIR/file2_name
# repeat for all files
Now you should be able to verify your request and get certificates. If everything went ok, you should receive 3 files: Certificate, Private Key and CA Bundle. Save them on your local computer or directly on the server. Remember, always protect your private key!
Nginx requires 2 files: one is your private key, and the second one is made by concatenating Certificate and CA Bundle. Sample script for how to do this in Bash:
sudo su - # we want to have root privileges
mkdir /etc/nginx/ssl
echo "private_key_content" > /etc/nginx/ssl/example.key
echo "certificate_content" >> /etc/nginx/ssl/example.crt
echo "ca_bundle_content" >> /etc/nginx/ssl/example.crt  # '>>' for appending
Now we’re all set! Time for configuring nginx.
Nginx configuration
I’m assuming you already have something like this for serving your site:
upstream site {
    server localhost:8080;
}

server {
    server_name example.com;
    listen 80;
    location / {
        proxy_pass http://site;
    }
}
Working configuration for SSL (with few improvements) looks like this:
upstream site {
    server localhost:8080;
}

# blocks if someone want to access your server by IP address
server {
    listen 80 default_server;
    return 444;
}

# redirects to HTTPS version
server {
    listen 80;
    server_name example.com;
    return         301 https://example.com$request_uri;
}

# proper request handling
server {
    listen 443 ssl;
    server_name example.com;

    # location of key and certificate files
    ssl_certificate /etc/nginx/ssl/example.crt;
    ssl_certificate_key /etc/nginx/ssl/example.key;

    # cache ssl sessions
    ssl_session_cache  builtin:1000  shared:SSL:10m;

    # prefer server ciphers (safer)
    ssl_prefer_server_ciphers on;

    # important! protects your website against MITM attacks.
    add_header Strict-Transport-Security "max-age=604800";

    location / {
         # these headers contains information about original request
         proxy_set_header X-Forwarded-For $proxy_add_x_forwarded_for;
         proxy_set_header X-Forwarded-Proto $scheme;
         proxy_set_header X-Real-IP $remote_addr;
         proxy_set_header Host $http_host;
         proxy_pass http://site;
    }
}
I’m using example.com as a domain. Of course you should replace it with your own 🙂
Also, remember to unblock port 443 on your firewall. If you are using ufw (uncomplicated firewall), you can do it like this:
sudo ufw allow 443
sudo ufw reload
Check if it’s working
Reload nginx (on Ubuntu sudo service nginx reload) and visit your site. If everything is done correctly, you should see that connection is encrypted.
Hope it helps!